
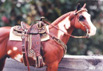
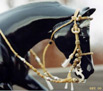
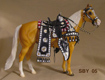
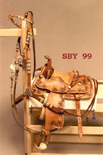
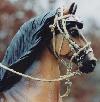
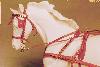
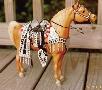
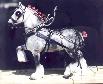
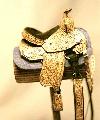
             | Come on board and enjoy this gallery of artist Susan Bensema Young, model horse tackmaker since 1979 and author of that classic book Guide to Making Model Horse Tack (1998) updated (2016) and available as a pdf! My Tack Sales Info page has news and updates as to what I've been up to, even when this main page does not. March 13, 2024 Once again it's been almost 2 years since the previous update! Clearly this website is for longer time spans; but there is still relevant news to be found here. When the time is right, this page will direct you to our new book. Until then, remember the Guide to Making Model Horse Tack is NOT duplicated in the new book, but forms its foundation. If you want to learn how to make tack, you couldn't do better than to get both books. You are invited to view the workings of the TSII on its FaceBook page, Timaru Star II Model Tack (link above on right). The Susan Bensema Young FaceBook page tries to carry everything that is not TSII, but there is much overlap. This page will continue to review some of our tack, made from about 2018 (Brasenose's bridle and neckpieces) to December of 2022. Enjoy! 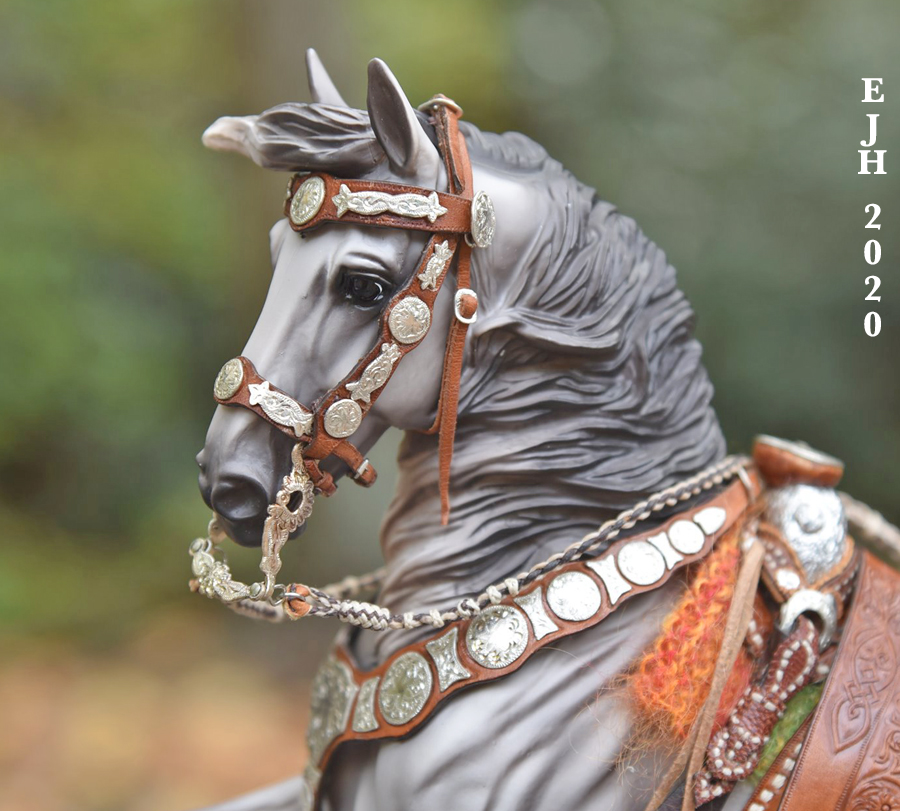 A word on the blanket of this set. It was knitted by Lizzie Chelius Kanavy, a non-hobbyist but a very good and kind friend. Here we see the entire saddle on Straight Bet, known as Toucano in my herd. 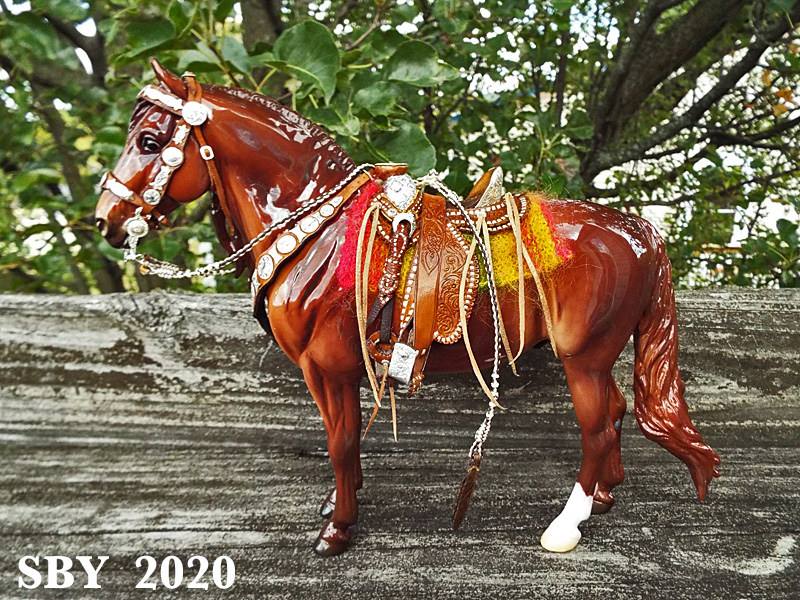 These next three photos show close ups of #457, Eleanor's Goehring No. 2. The metal used was Argentium, man-made silver that doesn't tarnish hardly at all. I do all my own engraving. 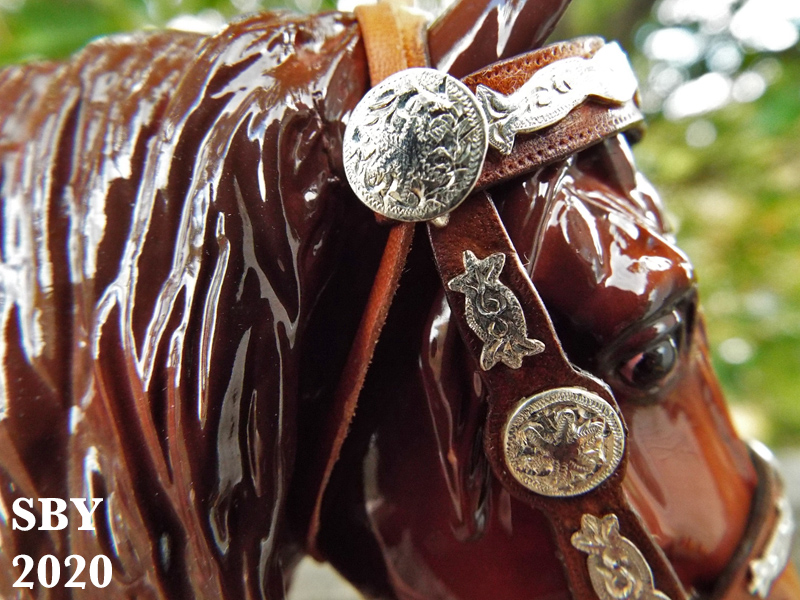 The uppermost, first picture was taken by the owner at time of delivery. This is TSII #457, the second Clyde Goehring Mexican Parade Silver Saddle built. It was delivered in October of 2020 in person, something that took many weeks to arrange. During the visit, the bit was swapped for one I had given Eleanor a year before; but did I remember to then photograph the set? Hah, no. She did, and sent me this. Whereupon I promptly proceeded to stash the picture in a place I couldn't find until now. The saints alone know what goes on in one's computer files... Pretend the mouthpiece of that bit is just below the ring of the bithead, above the hole, right where his mouth corner would be. It could fit. 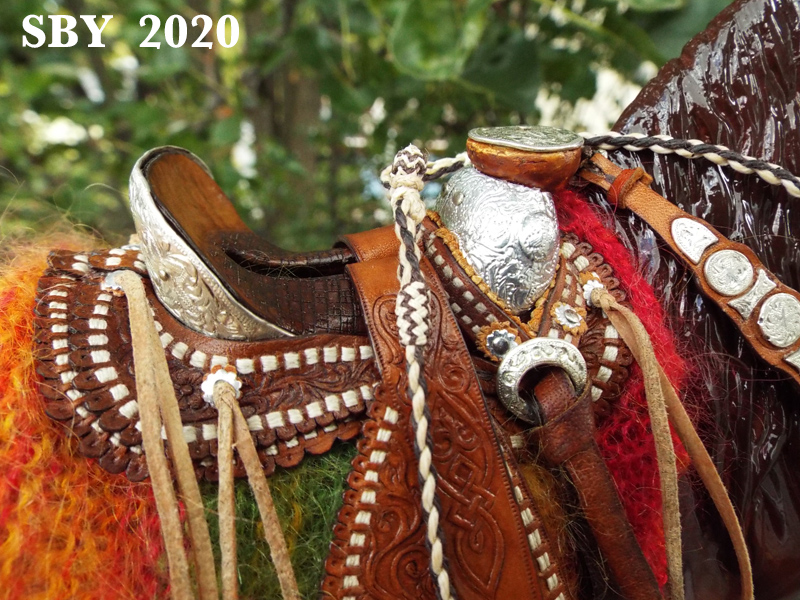 There are eight blog posts on just this one saddle. A list of them is in the blog post for October 11, 2020. We braided these reins from waxed linen thread, and engraved all the Argentium. 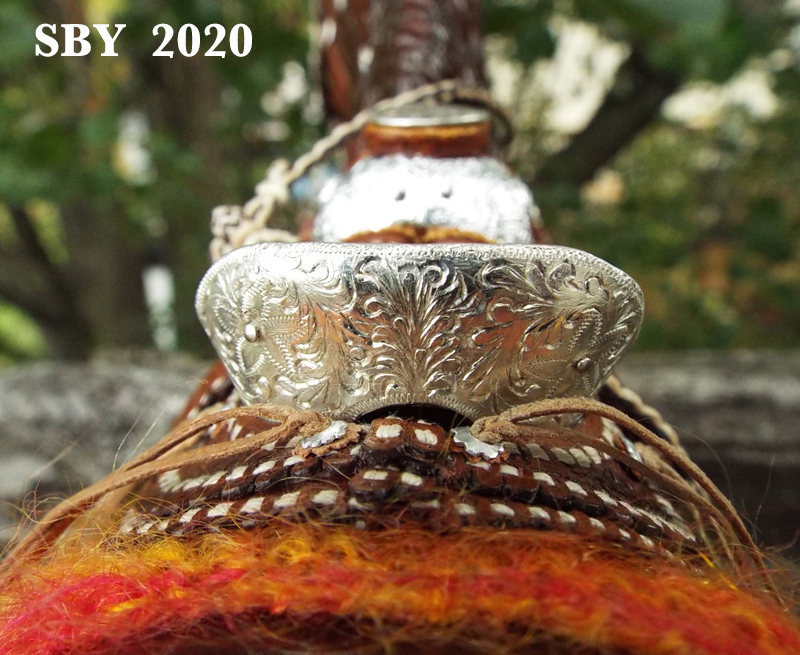 One of the thrills of the past 3 years has been the rise of the Akhal Teke in my collection of model horses. I did not know I had it in me to fall in love with another breed! Finding out about this lovely exotic breed of horse inevitably expressed itself in making their beautiful silver-ornamented halters, bridles and neckpieces in miniature. So far the TSII has made five Akhal Teke sets, of which this green one is the second, known as AT2. Those are real emeralds, courtesy the Tucson Gem Show (and Gems-4-Less!). The horse is Brasenose, my first NaMoPaiMo horse -- I painted him myself! He was sculpted by Margarita Malova of Bologoye Russia, and I love him to pieces. 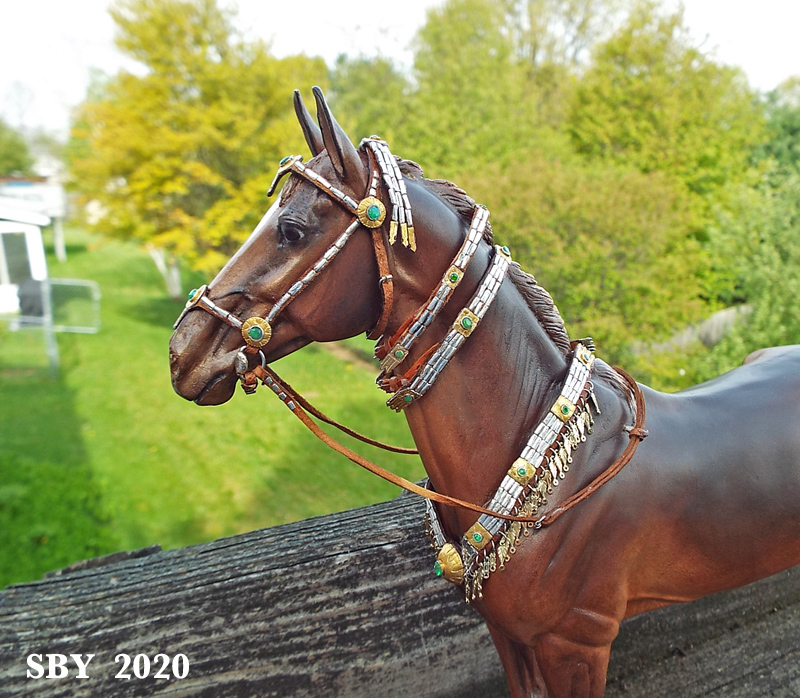 I had so much fun with these. Although they were exhausting, with each little plate having to be individually hand-formed, I was very satisfied with the finished look. Of all model Teke sets I have ever seen, I like my own the best. However, I have not extended my attempts to their blankets and saddles. Here I think someone else could probably could do really well. I had so much fun with these. Although they were exhausting, with each little plate having to be individually hand-formed, I was very satisfied with the finished look. Of all model Teke sets I have ever seen, I like my own the best. However, I have not extended my attempts to their blankets and saddles. Here I think someone else could probably could do really well. The new mold of Altynai just gave me more real estate to exploit. Saints preserve me from having to conga this big guy, but I already have two. This set, AT3, is owned by Carrie Sloan Meyer. 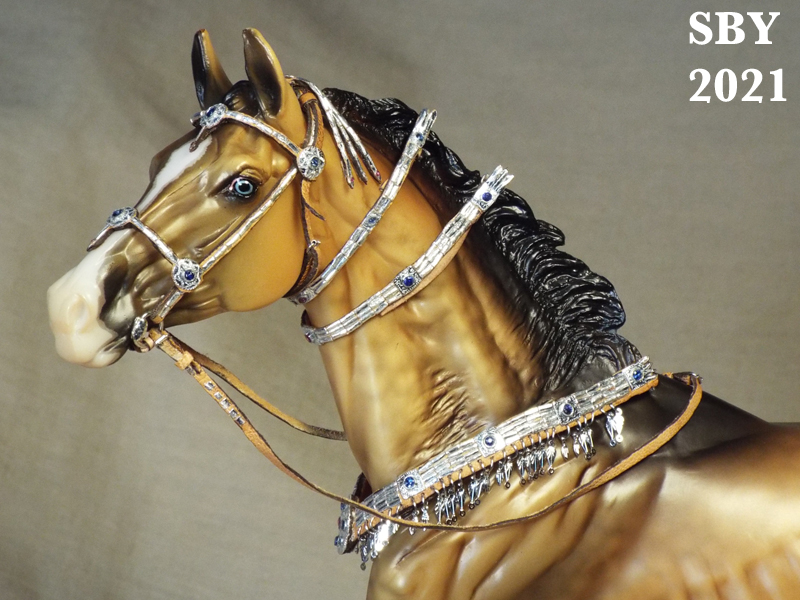 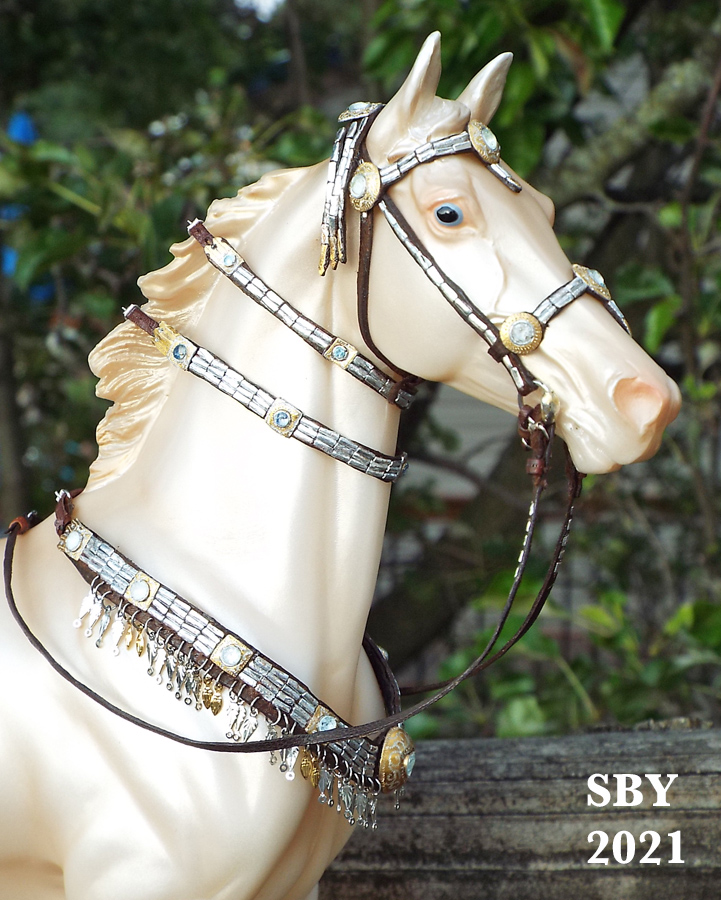 Don't you love how the colors of the light blue Aquamarines went so well with this blue-eyed Perlino Lonesome Glory? Danielle Feldman, who owns this set, chose the stones for it, and I think she had excellent taste. This set is known as AT4, the fourth Akhal Teke Presentation set I ever made. The next section of this page looks at three TSII Western saddles that were either partially or completely rebuilt, restored and refurbished during the years 2020, 2021 and 2022. I'm only slightly surprised that this work represents fully half of my output these days. There are over 450 Western saddles out there by me, and many of them deserve to be fully restored. The saddle on Karen Gerhardt's lovely Arabian resincast Denderah is an oldie, TSII #89, built originally in 1985. It was lovingly rebuilt and refurbished in the summer of 2021. This effort spawned four extensive chapters of documentation on my blog. If you want to know more about taking these saddles apart and putting them back together better, check those chapters out. 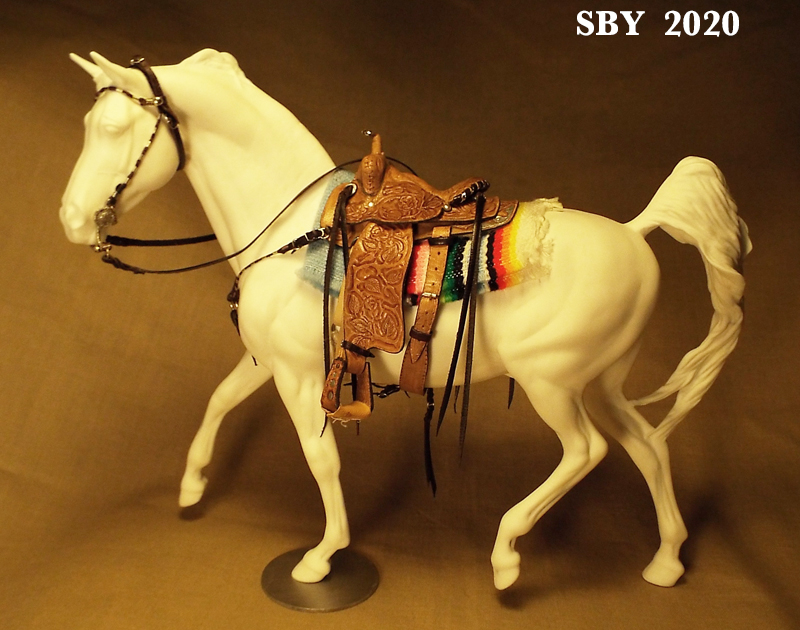 TSII #413 (below) was one of my absolute favorite sets and I jumped at the chance to replace its braidwork. I had not realized this would mean entirely re-doing the whole thing! Thank heavens Kathryn had the patience for it... I apologize somewhat for the 'upside down' appearance of this angle of view. But, really, when you're trying to show every part of a braided-edge saddle and bridle set, this makes sense. 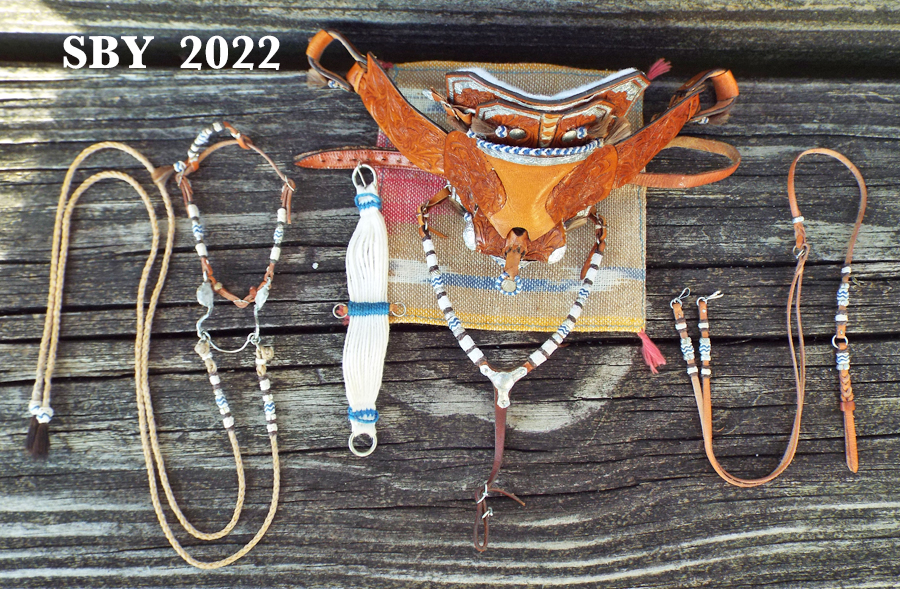 The tiny scale of Little Bits, 1:18, would be massively important in 2021 and 2022. First, I rebuilt a TSII Silver Parade Saddle, #430, which had been sized for the Little Bit Morgan. 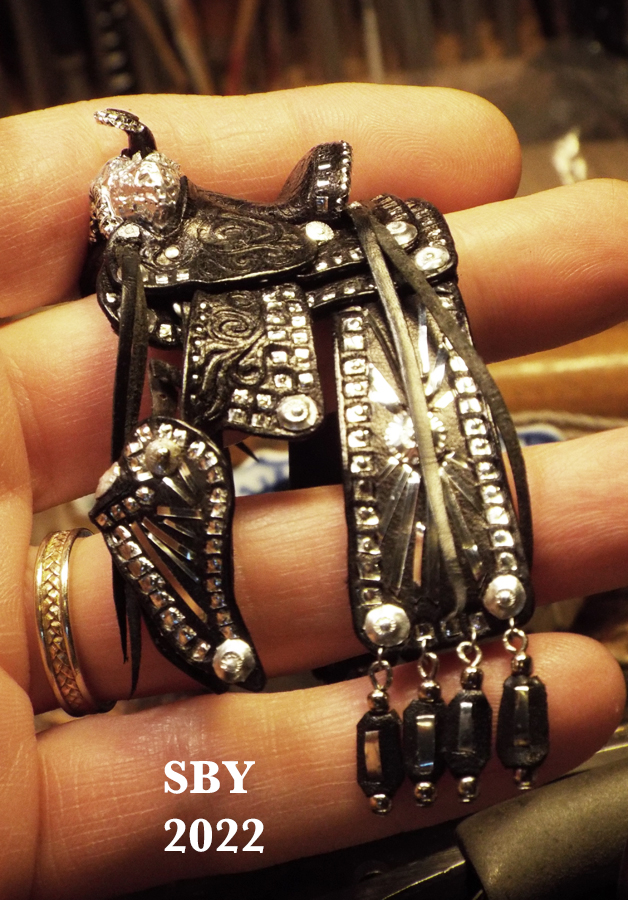 And then I got into something completely different, when Gail Berg talked me into trying the Lead Pair of the 20-Mule Borax Team. These lovely mules were sculpted by Candy Liddy. They really are small; see them next to Seurat on the Fraley Vermeer mold! (Friesian Sporthorse) This project took the most patience of all, extending from the fall of 2020 to February of 2022. I rendered weekly reports for many of the final weeks, ultimately tabulating 34 weeks for the few but interested and extremely patient friends who watched and waited with me while these were born. 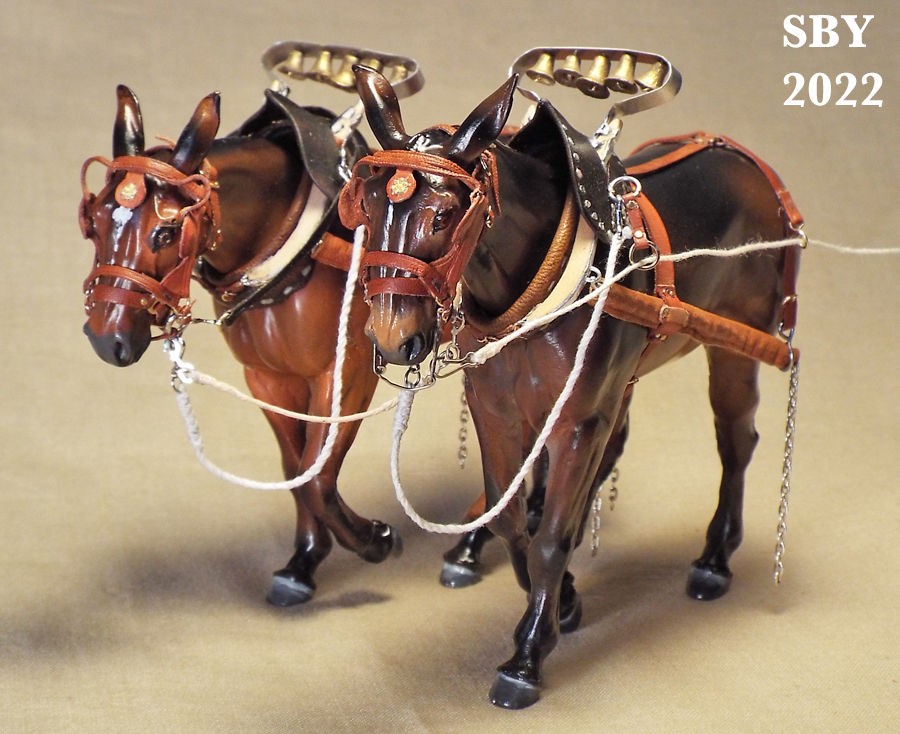 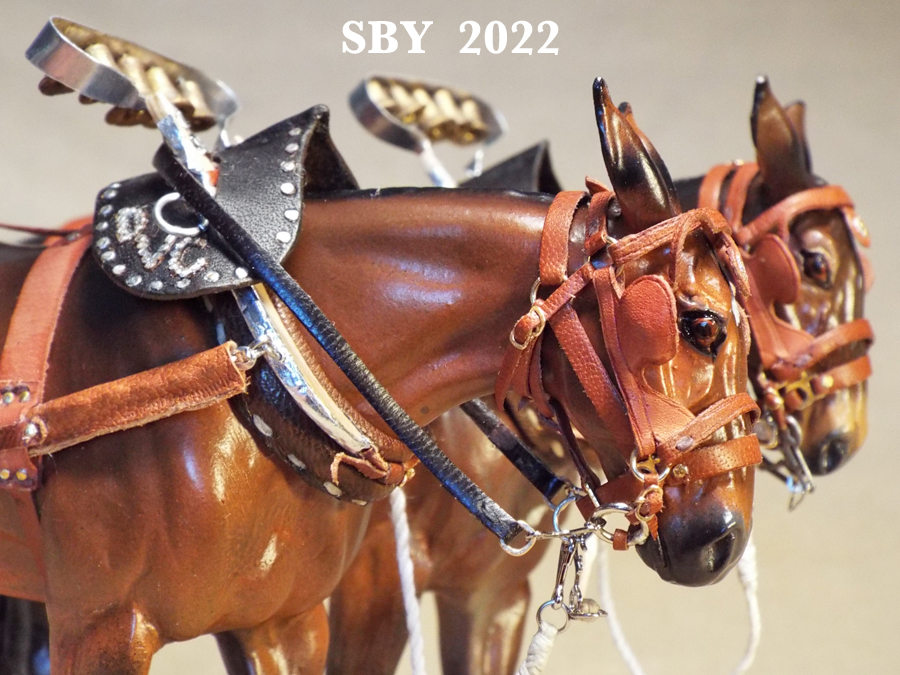 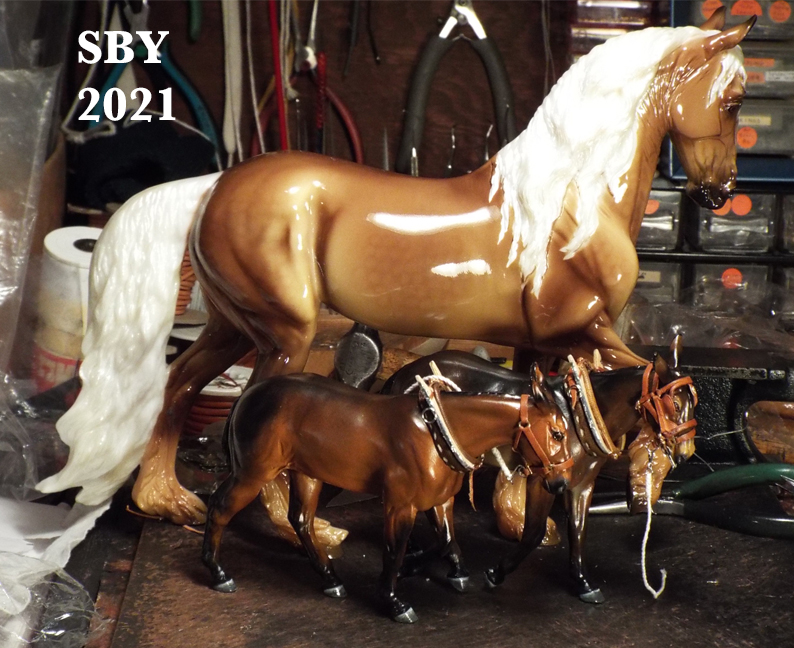 Below we have our most recent piece of braidwork, a Small Trad scale Bosal Hackamore made for the new mold of Nikolas. He is the same size as the Pony of the Americas, released back in the 1970s! What fun to dabble in a new scale for me... This Hackamore was sold in November to a very good client, L Coleman. I have to salute the Coleman family, as her husband got the Akhal Teke neckpiece I was offering during BreyerFest of 2021. Thank you so much, you two; I hope you enjoy the pieces. 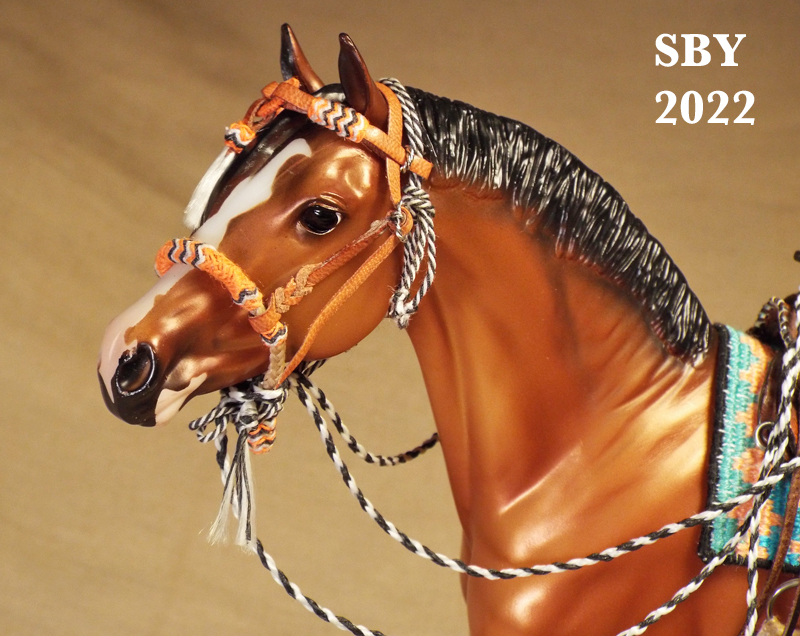 Last of all, below, another NaMoPaiMo horse I painted, Orlik by Malova. The bridle is Tissarn's Hackamore, another piece of headgear we will be seeing more of as my next book progresses! The doll is my only Field of Dolls acquisition, from Anne Field, whose work is so collectible. I really liked this one and felt it was work I wanted to support, among other qualities. 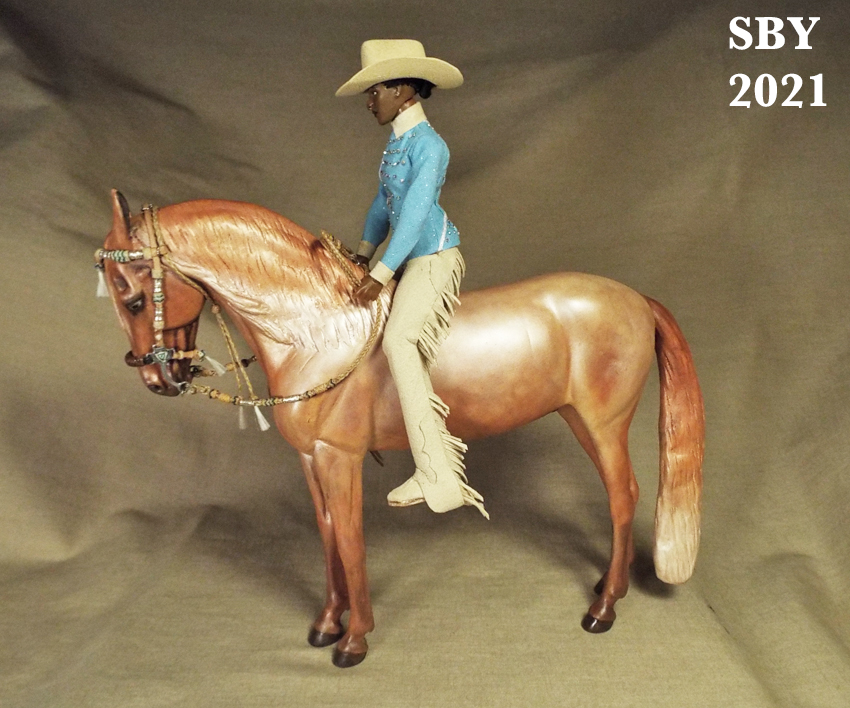 (BEN-sum-uh) (TIM-uh-roo). My eBay name is timaru-star-ii. This page updated every used-to-be six months, but now it's god-knows how many years. My blogspot is a much better bet, sporting 20 to 40 posts a year. Normal email answering time is 1 to 3 days. You can FaceBook message me and I'll usually answer in a day. Happy Tack Collecting!! |